Installing UNi Xonar drivers
Prerequisites
- UNi drivers (UNi Xonar W10 1825 v1.81a r2 for W10 or UNi Xonar 1816/1823 v1.80a r3 for W7, W8 & W10)
- XonarSwitch (latest)
Step-by-step installation and configuration instructions
-
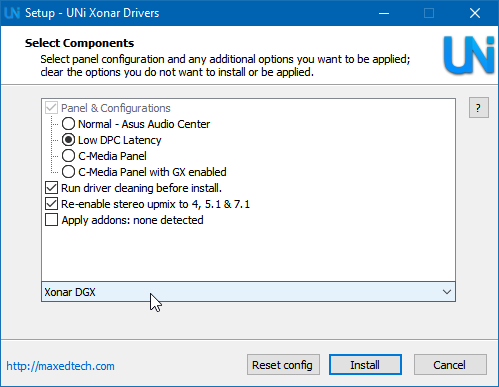
Select "Low DPC Latency", "Run driver cleaning", "Re-enable stereo upmix" and choose your sound card from the "Default card profile" list:
-
[Optional, this may lower DPC latency] After you've installed the drivers, restart your computer and after that press Win+R key combination; type "msconfig" there and continue. In the programs tab disable "Windows host process (Rundll32)":

-
Place the XonarSwitch.exe in desired location and launch it.
-
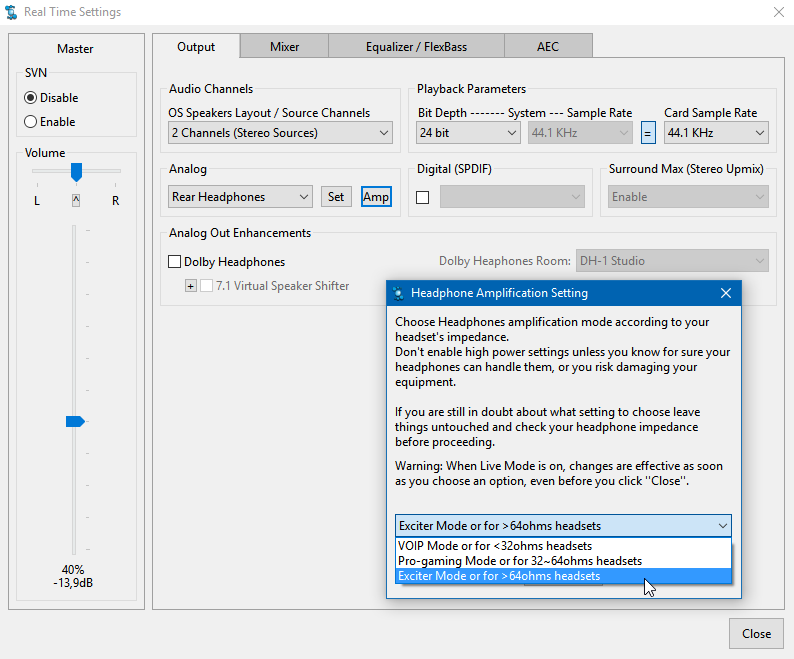
Output tab: Select "2 Channels" from the Source channels list, and set the Bit Depth to 24bit (or 16bit, there's not that much of a difference) and Sample Rate to 44.1Khz.
-
Output tab: Click the Amp button and select an appropriate impedance level from the list depending on your headphones (VOIP is for 0 - 32 ohm headphones, Pro-gaming for 32 - 64 ohm and Exciter for 64 - 150 ohm). I recommend using the rear 3.5mm connection because it has less interference (Rear Headphones):
-
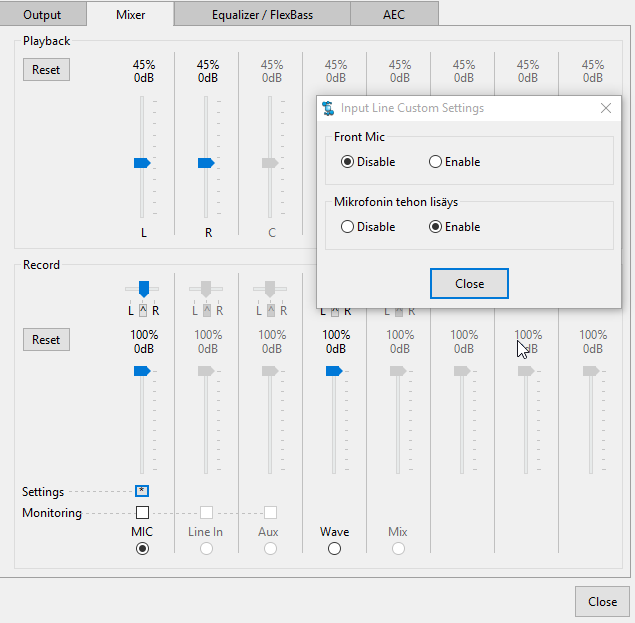
Mixer tab: Set L and R playback volume to 45% or less (this is because over 45% might cause clipping in your audio).
-
Mixer tab: Set the microphone (record) volume to whatever value you like and click the settings button (* icon). Disable the front mic if you're using the rear port (which is recommended) and decide do you want to use mic boost:
-
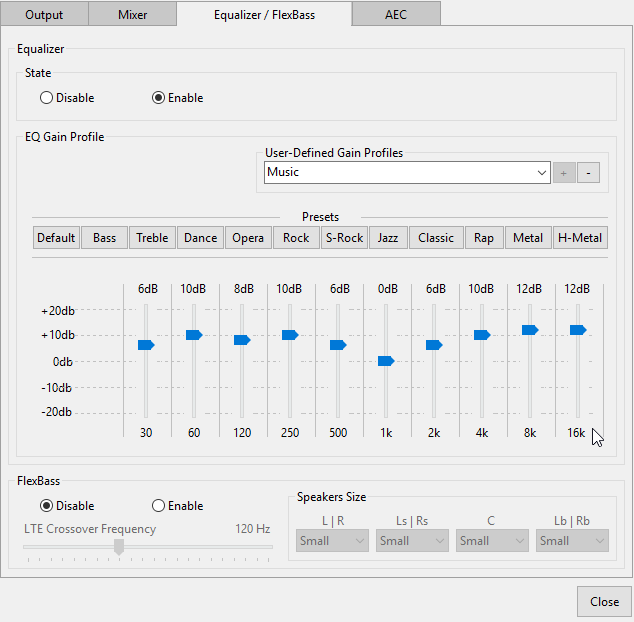
Equalizer / FlexBass: Adjust the equalizer if you need to and disable FlexBass:
-
AEC: Disable AEC.
-
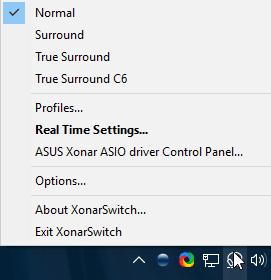
You can find additional options by right clicking the XonarSwitch icon which you can find in the taskbar:
-
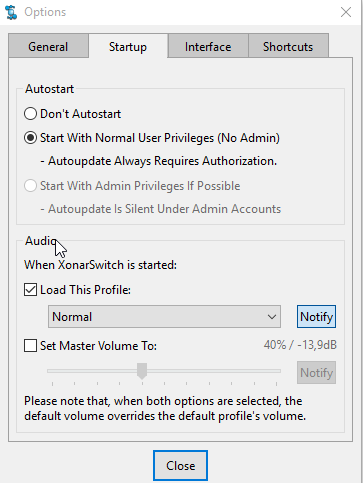
Options: You can backup and restore the settings of the UNi drivers and completely uninstall the drivers. Set the XonarSwitch launch automatically on startup:
-
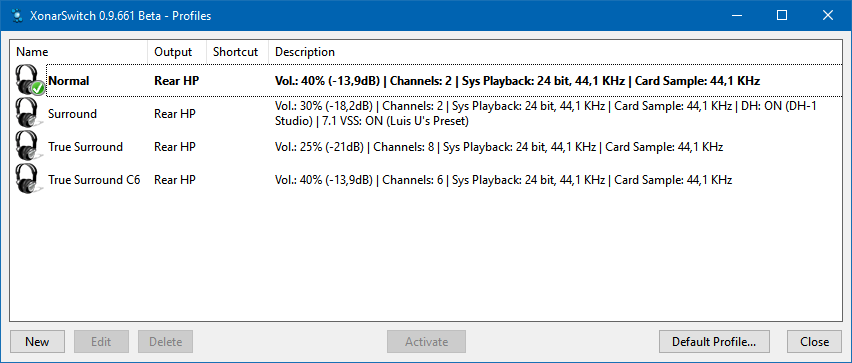
Profiles: You can create multiple profiles. For example if you want to use surround while watching movies you can create a specific profile for that which you can activate by pressing a custom key combination (eg. CTRL+ALT+1):